30.1.14

Extended Practice proposal

So since before we broke for christmas break we were given the briefed for the Extended Practice module which works out as a final mayor project. Straight away I knew what I wanted and need to do, mainly because I want to take part on the GameRepublic Student show case 2014. Hearing some of the judges last year I noticed that what they want to see more is playable games, not just artwork, characters or empty environments. This straight away made it quite difficult as I know near to nothing about programming, but before giving up I went and did a bit of research. It turns out that there are plenty of softwares out there that help you make a game without the need of learning complicated coding languages such as RPG Maker, Scirra's Construct 2, Stencyl, Game Maker and UniRPG, among many many others. 
Most of them where made for 2D games that require sprite sheets. I really wanted to try something simple in 3D as 2D sprite sheets is pretty much what I do at work, but there aren't many engines on 3D that are easy to learn. 
Being realistic, I'll stick to 2D if I want to achieve my goal, and seeing that I got the liberty of choosing any style, I might up to use pixel art. Hopefully staying away from 3D environment won't make me rusty in a way, I'll probably be looking out for other small 3D competitions to keep up to date. 

After submiting my proposal I got some feedback on the stuff I need to work on:
- Cement the detail beyond just making a game
-Identify what will I produce at the end of this project (a polished portion of the game is better rather than an unfinished complete game.) 

So far I've been quickly playing some indie games of the like and I've come down to very initial concepts which I'll be discussing later :) 
Time to plan and start working! 

17.1.14

Finished Character

So the day of submission comes and I'm sort of done with the practical. As always there's a lot of room for improvement but here's the over all of the project. 
I'm not entirely happy with the end result; some of the aspects that I would like to work more on is the textures (specially on the hair and eyes), good rig, blend shapes and some animation. 
I did manage to rig the character, but got stuck on the weight painting as I managed to lock the weights and I wouldn't modify it... probably did something wrong buy it was taking me a lot of time to fix it. Blend shapes seemed pointless if the character was in a still position. 
For the textures, it's harder to make them than it looks; on Maya they look one way, Unity3D another and UDK another. The hair look fine on Maya but the eyes didn't and the other way around on UDK. It becomes a bit of a try and error, quite time consuming. Next time I'll be trying the textures only on the final engine that it will be render at. 

Speaking of engines, quite disappointed at Unity at the moment and really looking forward of learning some UDK. The quality of the real time render is far superior on UDK and it pretty much makes everything look pretty. This is the final video for the turn table of Arnold. It was done real time, I just capture the screen video.

The baking of the normals are not perfect, this is the first time I've try Zbrush, topogun and xnormal, so there's a lot to learn, but I'm really happy that I finally got to try them and lose the fear of their interfaces. Next time, I'll work on separate parts of the body and bake separate normals. Also I'll avoid making a single mesh for the entire body, it would probably been easier to keep different polygon count on each part. 
I really like the process and it's fascinating to see how many changes can happen as you go along, depending what works best on paper and what works better on 3D. Looking forward to polish this and make new ones, but faster this time. 
Any feedback would be more than appreciated. 

Hand in time! 


15.1.14

Quick rant and change at last minute...

So the original plan was: make a character, rig, animate and export to a game engine...well that's not happening.
Main reason for this is because I completely underestimated the complexity of a software like Zbrush. I'm certainly comfortable to say that I can use it, but this is after a good load of over 35 hours of only tutorials, yet I still feel like there's a lot more to learn. This plus the time it took me to feel familiar with the interface didn't help much.
Shenanigans happening in my personal life like new job and change of housing didn't actually help either, but I will definitely put the slow process down to my slow learning curve.
End line with Zbrush: I love it! I definitely will incorporate it to my workflow from now on. Its quite a fun tool and it still has that artistic feeling to it.
The down side at the moment is the fact that the retopology wasn't brilliant, down to the lack of time and I don't even want to talk about the textures as the rushing has made me feel shame on how poor they are.
My main rant would be against Unity3D, mainly because I made some basic textures to test them out and surprise! it's not that easy. It turns out that is more complicated to get a shader that fit a basic standard for a game character (having a diffuse, specular and normal map working).
The options I found online required quite a lot of coding, which I know nothing... that or buying pre made shaders.... and I'm poor. It's not down to anyone's blame; the engine can do it, just the user doesnt know how, yet the user (me) has no time to start learning coding at all.

This is when I remember that I downloaded UDK engine not long ago. I open it once, got scared with the interface and never touched it again, but thanks to youtube and some useful tutorials, I managed to start importing stuff and working my way around. At this point it might end up with crappy looking textures still, but at least I know that I'm trying something that makes everything look 10x better instantly (in my opinion). I'm yet to figure out how to do transparency to make the hair and eyes to look decent but this is a screen shot after 10 mins of trying UDK:


I'm in love with this engine! I know it will require tons more coding that Unity, but if at some point I'm going to have to learn some, I might as well do it on this one. Mind the textures as they clearly need a lot of working, but also, due to time constrains, the end result might not be much different.
10.1.14

Gaming topology

The retopology for the body is going to require, just like the face, a specific arrange of the topology according to the movement it will have. 
I'm talking mainly about the bending parts like the elbow and knees. 
I found some quite helpful tips online that clearly illustrate the best options for each case. This varies a lot from regular animation as the amount of faces has to be kept at the minimum. 
Funny enough, it looks like for places like the shoulders, the topology suggested follows the general shape of the main muscles, which makes me think again of how useful mastering anatomy must be for this process. 

9.1.14

clothing in videogames


This is a quick turn table with block colours for the clothing taken in Zbrush.
Something that I wouldnt mind in the future (when I manage to make a decent character that is) would be to try the same character with different outfits. It's something very common now a days to be able to customise your character and certainly it adds a lot of appeal to a game.
Simply on the process of concept art of for the character me and Sarah came up with at least 6 different costumes, plus while sculpting it, I felt like changing it several times.
At some point I'd like to go to the extreme and add ridiculous amount of details like they do on final fantasy games :)


8.1.14

Xnormal

For the operation of baking the normals and other details once the whole model was done, I opted for using an external software instead of using Maya.
A quite popular option is the software called Xnormal which has a very 'technical' interface as there is no interaction with any kind of graphic or model.
The process consist in uploading a high poly mesh in one slot, a low resolution one in another sloth, calculate the min and max distance and select the kind of maps that you want to be processed.
In this case I wanted a normal, an occlusion and a convexity map.
These are the results I got. Notice that I'm considering the head as one object, along with the eyes, hair and inside mouth, and the body with the belts as another.
I highlighted some of the issues that I encounter because I've had small cavities or close objects. Probably this would have been less problematic if I had gone and done each individual item separately, but that would have been time consuming. A lot of problems with the normals on the fingers and some overlapping faces like the gloves and the front of the trousers. Also the part of the lips where they get close to eachother cause a lot of issues in all maps. Over all, they could have been better, but for the speed of the baking process I think I'll target this issues on photoshop this time, but for future projects I'll do my best to avoid them. 

7.1.14

Clothing details

After spending weeks and weeks focusing in getting the face right I noticed that the body was made, but not polished at all.
I started re-sculpting pretty much everything because by this point I was more used to zbrush and its interface. 
I started to get some ideas of the type if materials I wanted for each part of the clothing but because I really wanted to go into detail I had to look for close up references of stuff like the type of stitching and seams I wanted to go for. I found that a good place to look for this kind if references where clothing shops online where you can not only see every angle, but you can also zoom in when you place the mouse over (pretty much I used YesStyle).
For the top vest I wanted it to be all leather with some 'cushion' parts on the sides. The logo I've been using to 'brand' my project is an eagle-type logo which I want to include somehow in the clothing so I'll probably put it as a decorative symbol in the back. 
Something I realised I didn't took in consideration when I originally drew the design was "how is he going to take the best off?". Not that he will, but part of the topics I wanted to touch on my essay was the believability so I couldn't let this little details pass by. I had to add an extra feature on the front where he could tide it up. Didn't go for a zipper because of the style I wanted to achieve so I used laces as if it was a corsette. 
Things that I never thought I've be looking up such as types of stitching for different kind of materials certainly became a priority. This only made me realise how little attention I've been paying to my surroundings.
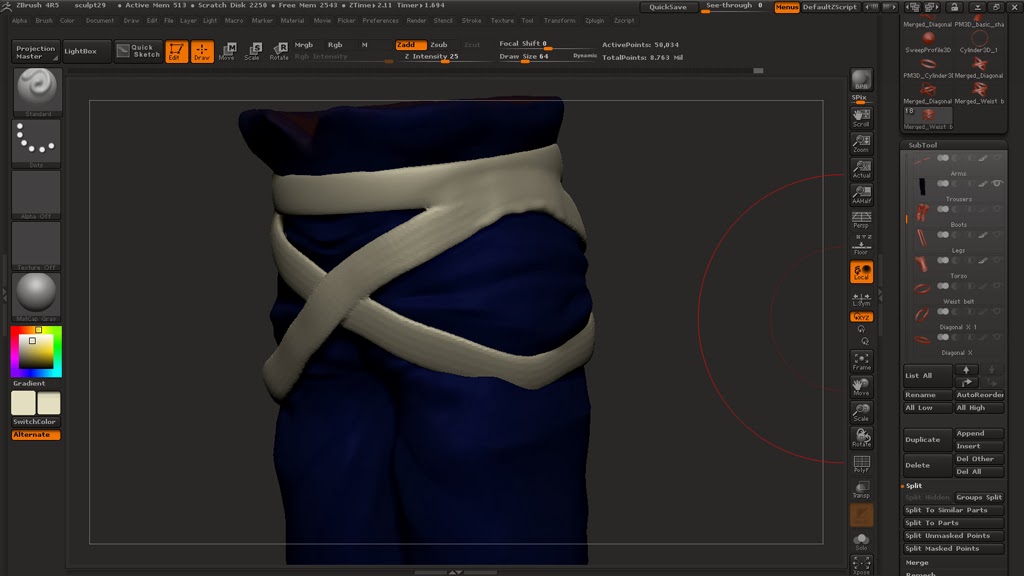
At this point I also discovered a very easy technique to simulate cloth within Zbrush that I will probably be using for the baggy shirt. Also the boots required a bit of attention as the integration of parts of metal weren't so common to find in other items. 
I thought that adding the details was going to be laborious and repetitive, but luckily is incredibly easy to work out how to create stencils, brushes and alphas that can convert the stylus into a sewing matching :)

These are some screen shots of the details on most of the clothing. The next process will be retopologyising everything (probably everything in one single mesh). Hopefully the details will look good on the normal maps.
Vest:


Straps: (I had to retopologised them early on to get the sharp edges). 


Gloves: I added some extra details that weren't on the original concept 


Shirt: 


Boots: I didn't like the original concept at, so before I took it to any details I ended up changing them pretty much entirely. 


This is the detail on the back of the vest. I'm planning to use that 'eagle' as the logo of my project.


These are not final colours, it was just to block out the groups and get a rough idea. Polypaint is not something I planned to do as I'll be working manually on the textures after the UV's have been made. 


Anatomy and loads of latin words


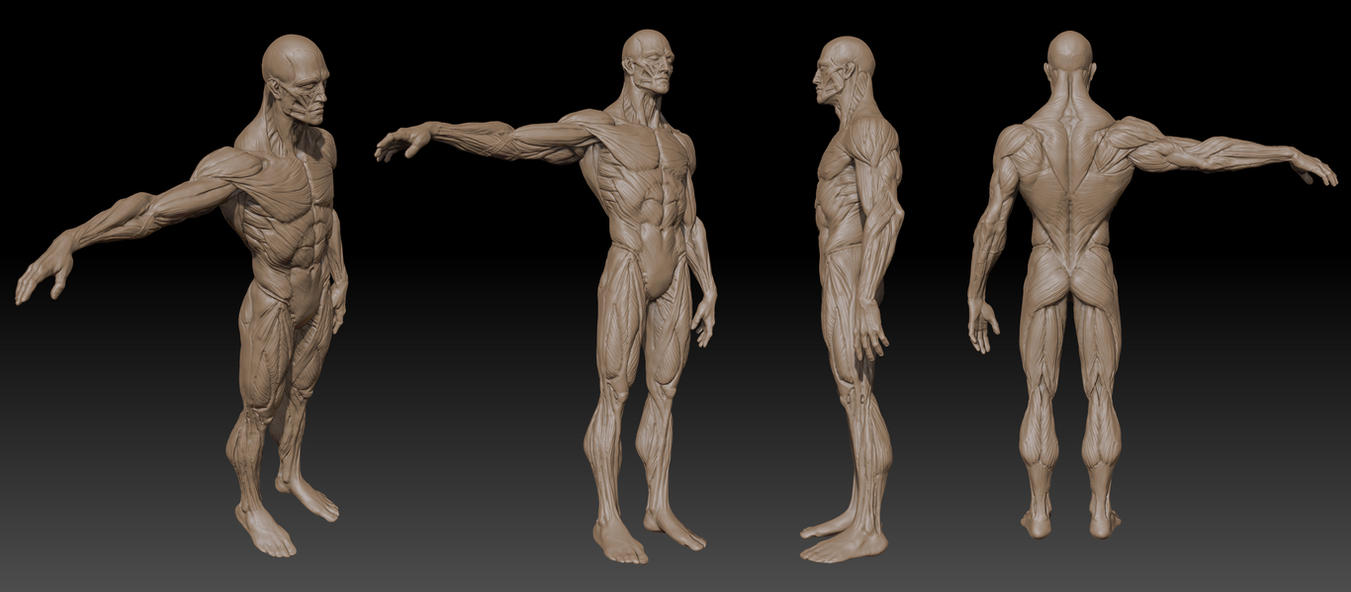
Something that was mentioned more than once by different artist during their sculpting tutorials was the importance of anatomy and the complete understanding of it. 
Loads of names of muscles and bones where mentioned and once they realised that the audience might not have a clue of what they're on about, they would point out the amount of anatomical studies they've done just to get to the point of making something in good proportions. Regardless of whether is or not a realistic approach people target on their sculpting, a good anatomy is the key for a believable human model. This clearly leaves out the creation of anything alien or beast-like but even then, the understanding of it can help you create something imaginary and yet make it look logical and believable.

There are loads of sculptures through out time that have made majestic pieces of art, and that have made incredible studies of anatomy just to achieve their a certain piece of sculpture.
It was Gian Lorenzo Bernini's work that inspired me the most when it came to anatomy, because he not only had perfection on his anatomy, but he also expressed dynamism and over all, the feeling of human flesh. 


When I looked at tutorials about anatomy they seemed long and complicated, therefore it added to the amount of stuff I need to study. So far I've done my best to look at tutorials, and even managed to get a hand on a very handy book that is used by the NHS to train their staff; it's the Anatomy colouring book. Despite the fact that I thought that it sounded childish, it turned out to be a quite handy way to learn this process and by doing so it kind of has a similarity of when you're sculpting with the digital tablet. 
Either way my latin still a bit rusty and remembering names is not one of my strengths, so hopefully in time I'll be able to if not master, at least feel familiar with them and roughly know where they are.  

Retopology: Zbrush vs Topogun

After finishing sculpting the head I decided to jump straight to retopologising it and come back to finish the rest of the body later; mainly to try the entire process first and have a preview of the end result of the project.
I tried the retopologising tools in zbrush that involve modifying a zsphere vertex by vertex. The process was easy to grasp on, and the accuracy for the vertex to attach to the high resolution model was very good, although not being so familiar with the zbrush interface when it come to rotate or even pressing a key by mistake made this process a bit slow. 
When I finish the face I notice that my topology wasn't ideal. Not that I had big plans for facial animation, but if I wanted to imitate a next gen console character I had to stick with good topology. This are some screen shots from the process in Zbrush. 


I'm the many tutorial that I watch, at least half of them use a program called Topogun which like the name suggest only focuses on retopologising. I went through a small tutorial just to show me the basics and luckily it was a very easy software. 
Even thought I had symmetry activated I noticed that it didn't work %100 as it should; there were minor mistakes it would make that would later on pile up if I didn't address them straight away. This process became somehow unpractical, so I decided to only do one side and later on mirror it in Maya. Certainly the fact that you can jump back and forth between reference meshes is quite handy specially when you have a very dense mesh. Probably this tool is more powerful and I'm not exploding it to the max, but I'll make some time in the future to get some extra tutorials and get the best out of it.
This are screen shots in topogun, quite an easy interface and makes what can be a boring process into a smooth and relaxing one.